Building A Charcuterie Board + CO-OP Haul
Hi, it’s been a minute!

Lately, my go-to way to celebrate anything is by making a charcuterie board. There’s just something so festive to me about eating good cheese with all of your friends - and it doesn’t hurt when it’s insanely pretty to look at. Around Christmas of last year I started getting into making really elaborate and fun themed charcuterie boards; and while you definitely don’t need a theme or a reason to make one, it does make it a lot more fun (and it might make you feel better about spending a concerning amount of money on cheese). It’s also not very hard to make an occasion out of anything - for example, I like to call this one in particular an “End of Summer/Beginning of Fall Charcuterie Board” …… which seems like a perfectly valid event to celebrate. As a college student now, I can definitely say that it’s not easy living in the midst of covid. I know that having to stay socially distanced and not having typical college “events” can be boring, so making a charcuterie board with your friends can be a new tradition to start (I know it will be with my friends)!
While I’m definitely no pro, I’ve picked up on a few tips and tricks over the past several months from both social media and my own trial and error. Below I’ll show y’all the steps I take to build one, but before we get to that I want to share a few ways to make a charcuterie board a little less expensive - especially for college students who are (or anyone who is) on a budget!
SAVING MONEY On CHARCUTERIE
Unfortunately, the “fancier” you get with these, the more expensive your total will be - and speaking from experience, it’s not hard to get carried away and accidentally drop an absurd amount of money on one appetizer. Here are a few tips to make it a little more budget friendly:
Shop local & for produce that is in season. If you live near a farmer’s market, try getting all of your vegetables, fruit, bread, herbs, and condiments like mustards/jams/honeys from there! It’s usually much cheaper than at a grocery store and it supports local farmers and businesses! If you get your produce from a regular grocery store, try to shop for seasonal fruits and vegetables because those will be cheaper as well.
Buy in bulk. Maybe not for an item you’ve never tried before, but buying dried ingredients like crackers, nuts, and dried fruit in bulk will save you lots of money in the long run - especially if you get into making these boards more often.
Check sales. This might seem like common sense, but always make sure you check for marked-down bread in the bakery and produce that might be on their last day on the shelf.
Split the cost. If you’re making one with a group of friends, go in together and split the cost of everything!
Stick to more generic cheeses & meats and use cool condiments, crusty french bread, and less expected fruit/veggies to help amp up the “fanciness” of it; think figs, apricots, and blood oranges instead of apples, berries, and grapes.
Pick your battles. Splurge on 1 or 2 things and get cheaper items for the rest; EX: if you buy fancier cheeses and crackers, try to shop for less expensive meats/fruit/nuts/etc.

co-op haul
For this board in particular, I shopped completely at the local co-op in Fayetteville, Ozark Natural Foods. It’s one of my favorite grocery stores ever, and I’m not ashamed to admit that sometimes my friends and I go there for fun just to wander around aimlessly. It’s basically a local version of Whole Foods and sells tons of products from bakeries and farms from around the area.
Like I said earlier, I wanted to go for a blend of Summer and Fall inspired ingredients, so here’s a little haul of what I got from Ozark Natural Foods:
Cheese:
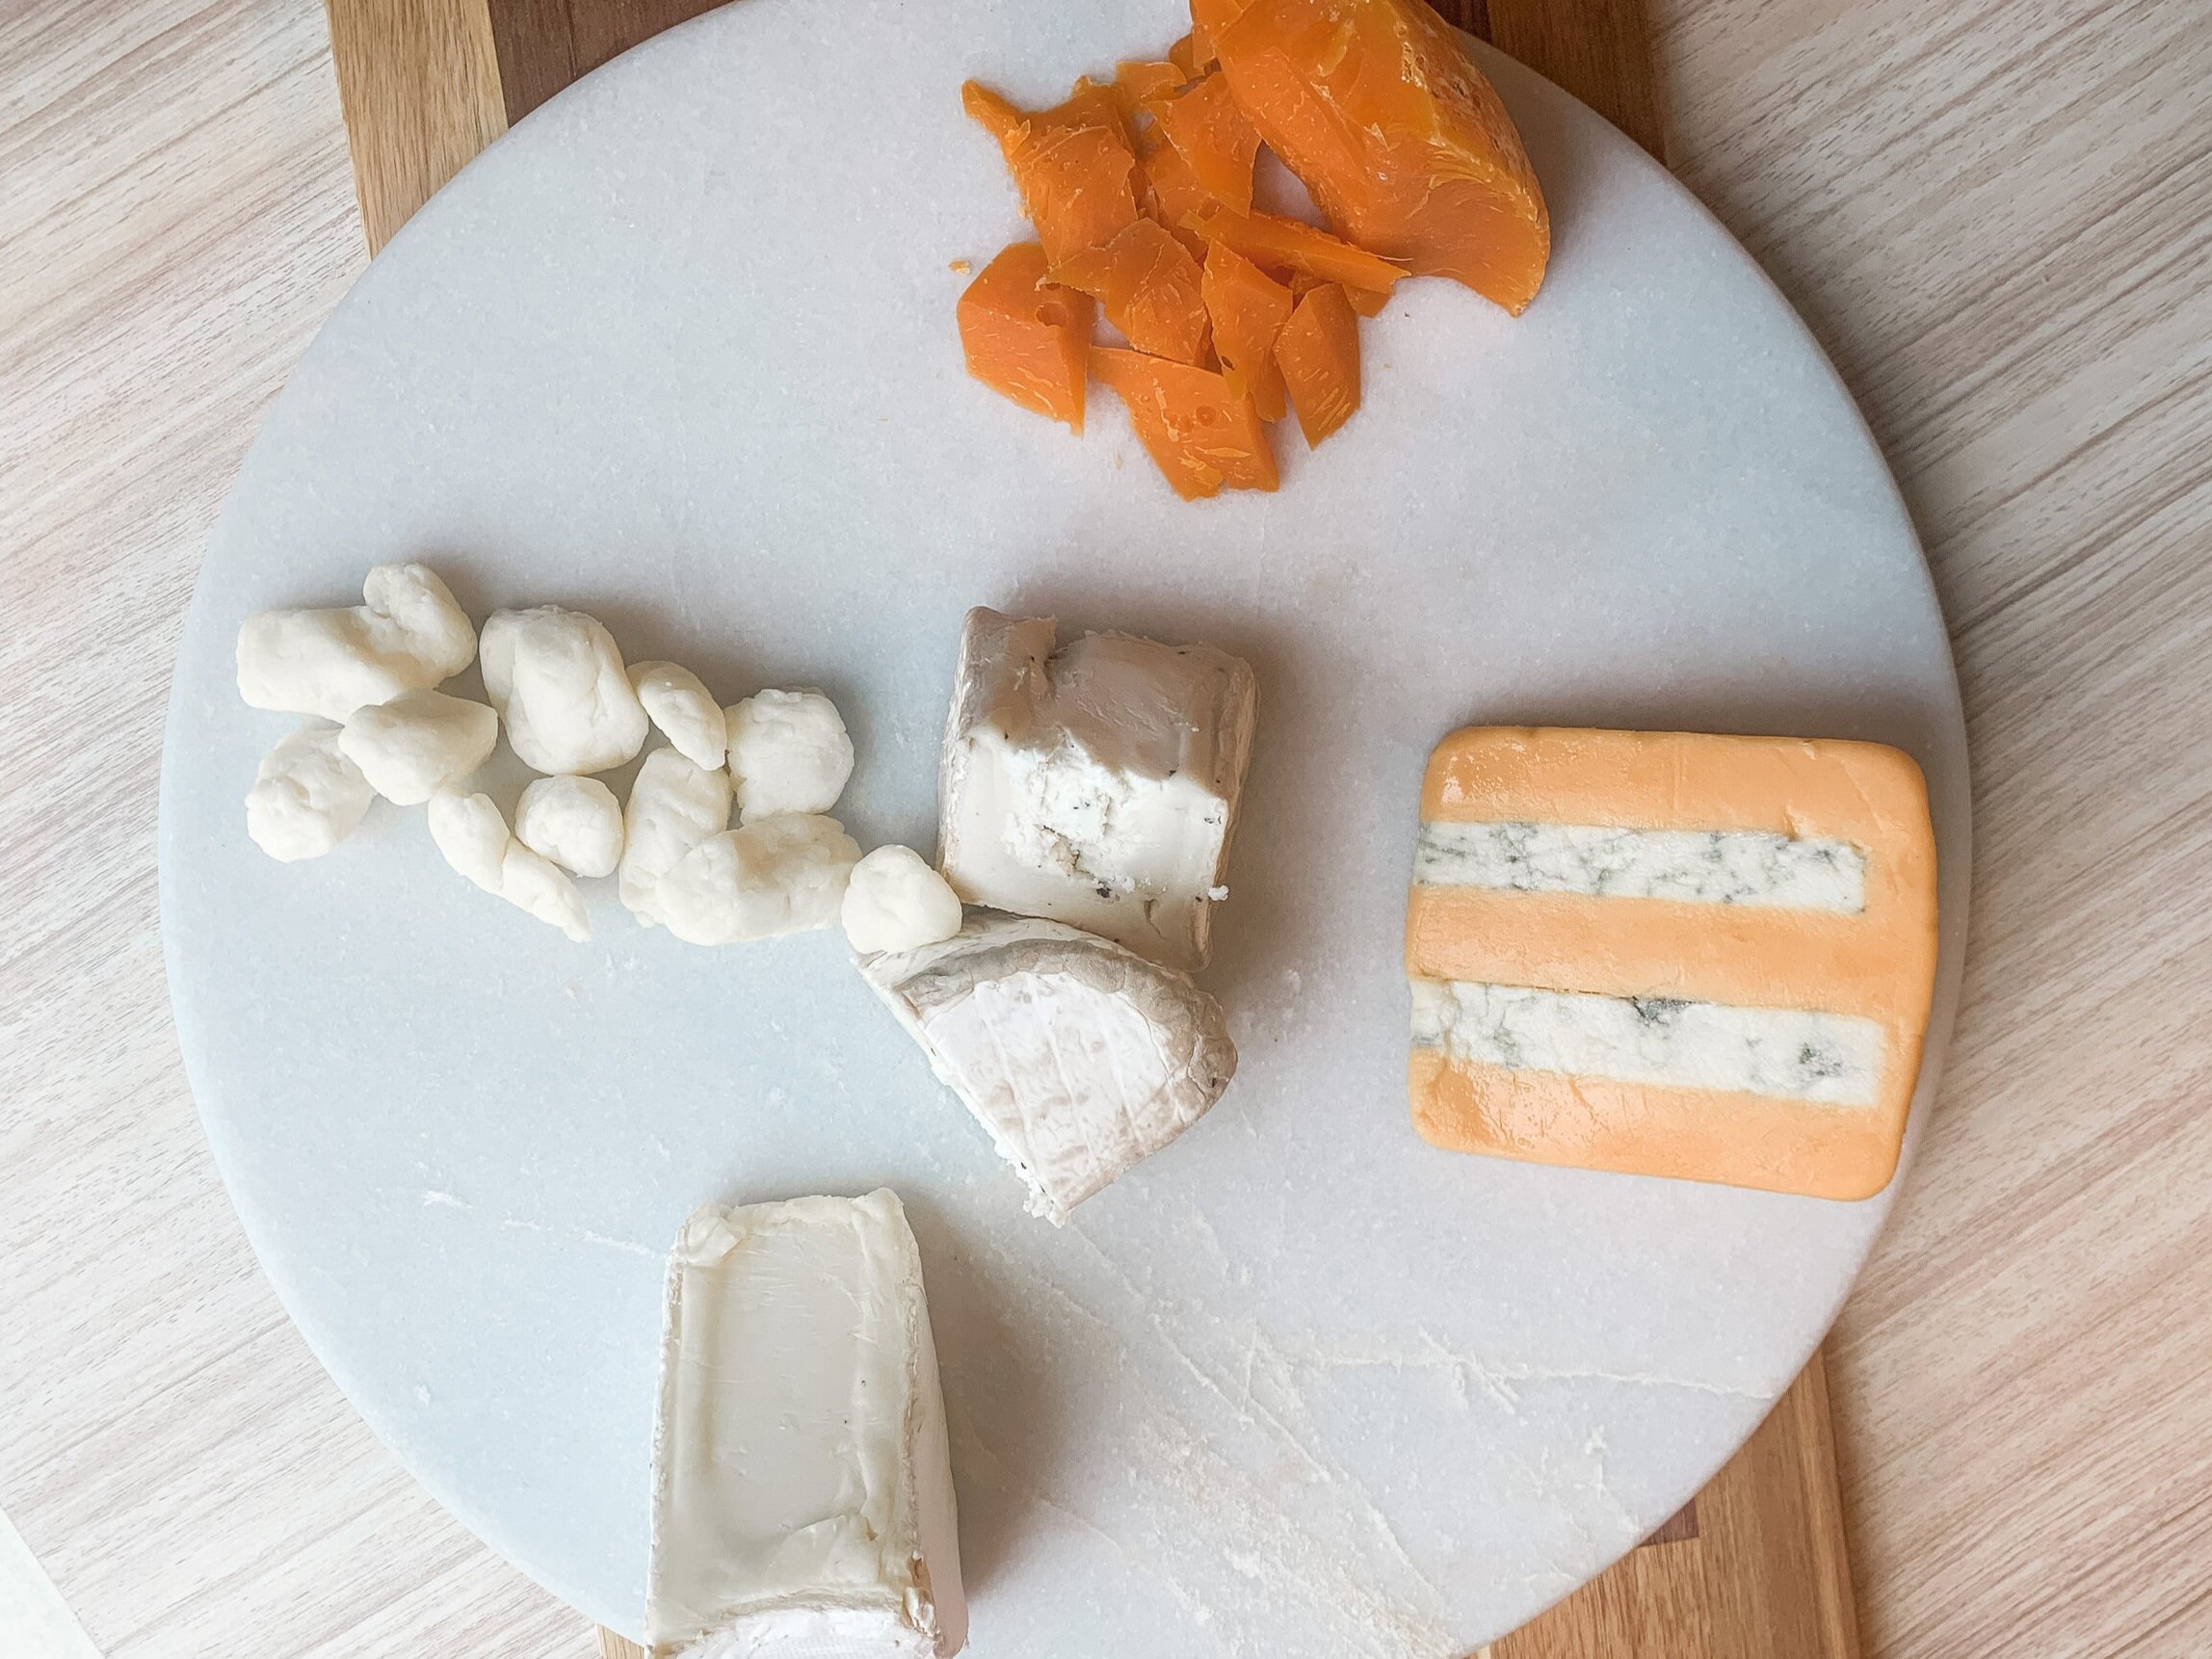
Cypress Grove Truffle Tremor
Belletoile Brie
White Cheddar Cheese Curds (SO GOOD!)
Fresh Mozzarella Ball
12 month aged Mimolette
Huntsman Gloucester & Stilton

Meat:
Capocollio
Soppressata

Fruit/Jams:
Black Grapes
Raspberries
Fresh Figs
Dried Cranberries
JamNation Strawberry + Key Lime Jam and Apricot + Almond Jam

Savory Snacks:
Cornichons
Green Olives
Marcona Almonds
Fresh Dill

Sweet Snacks:
Salted Caramel Coco Rolls
Effie’s Oatcakes
Green & Black’s Dark Chocolate

Bread/Crackers:
Dirty Apron Bakehouse Sourdough Loaf - local bakery here!
Plain Butter Crackers
BUILDING THE BOARD
Now for assembling the board…
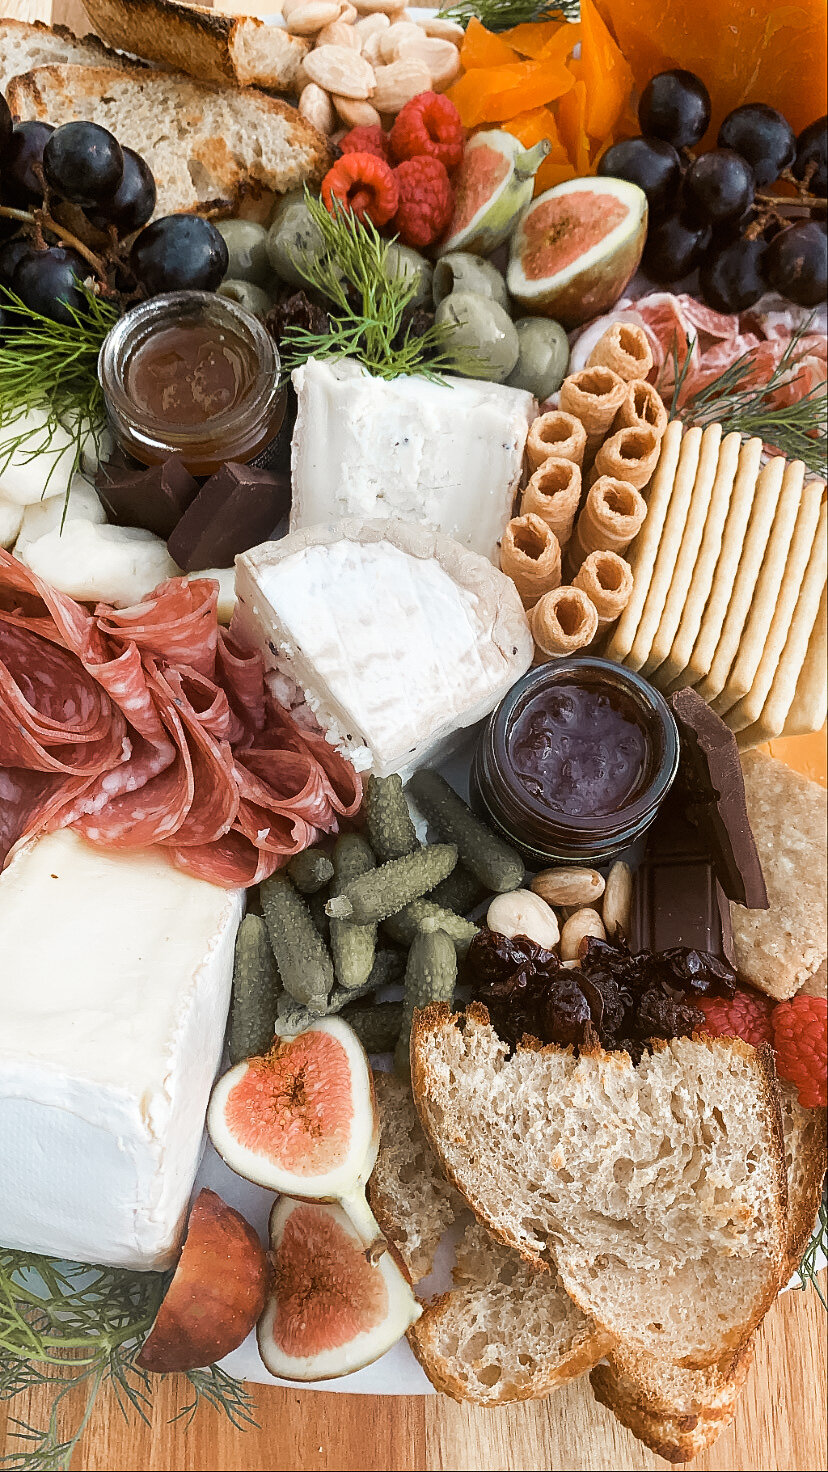
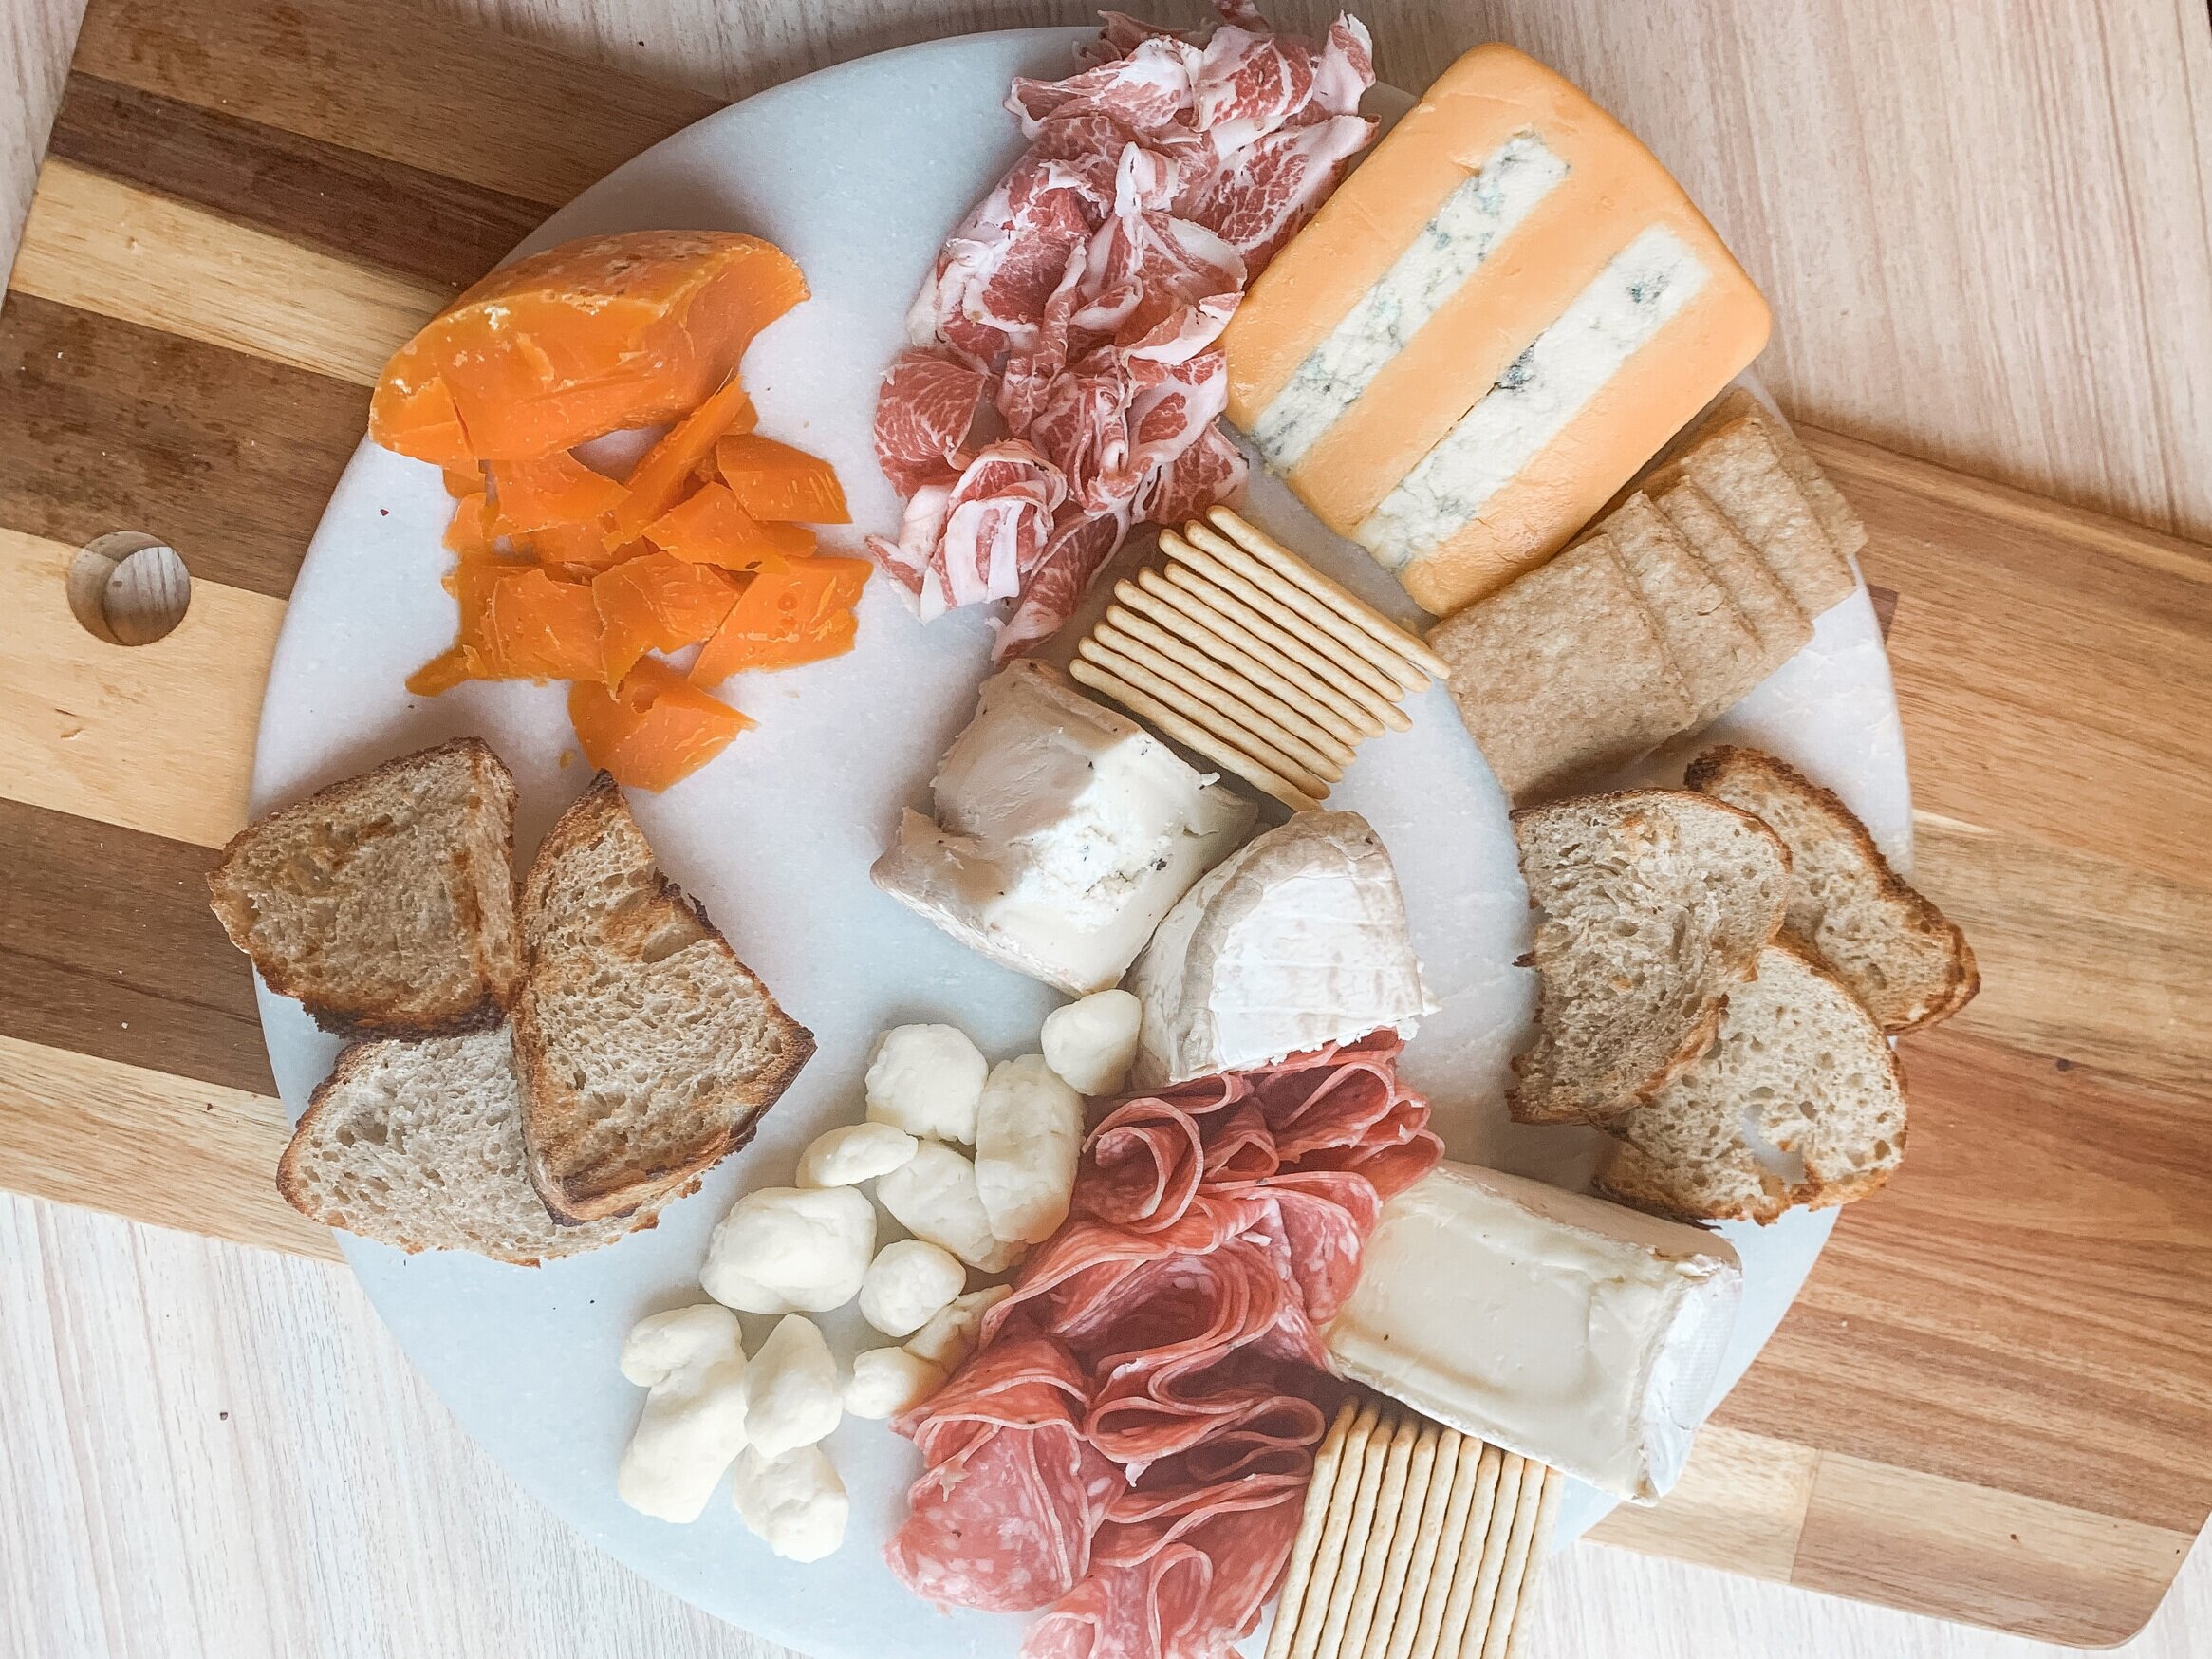
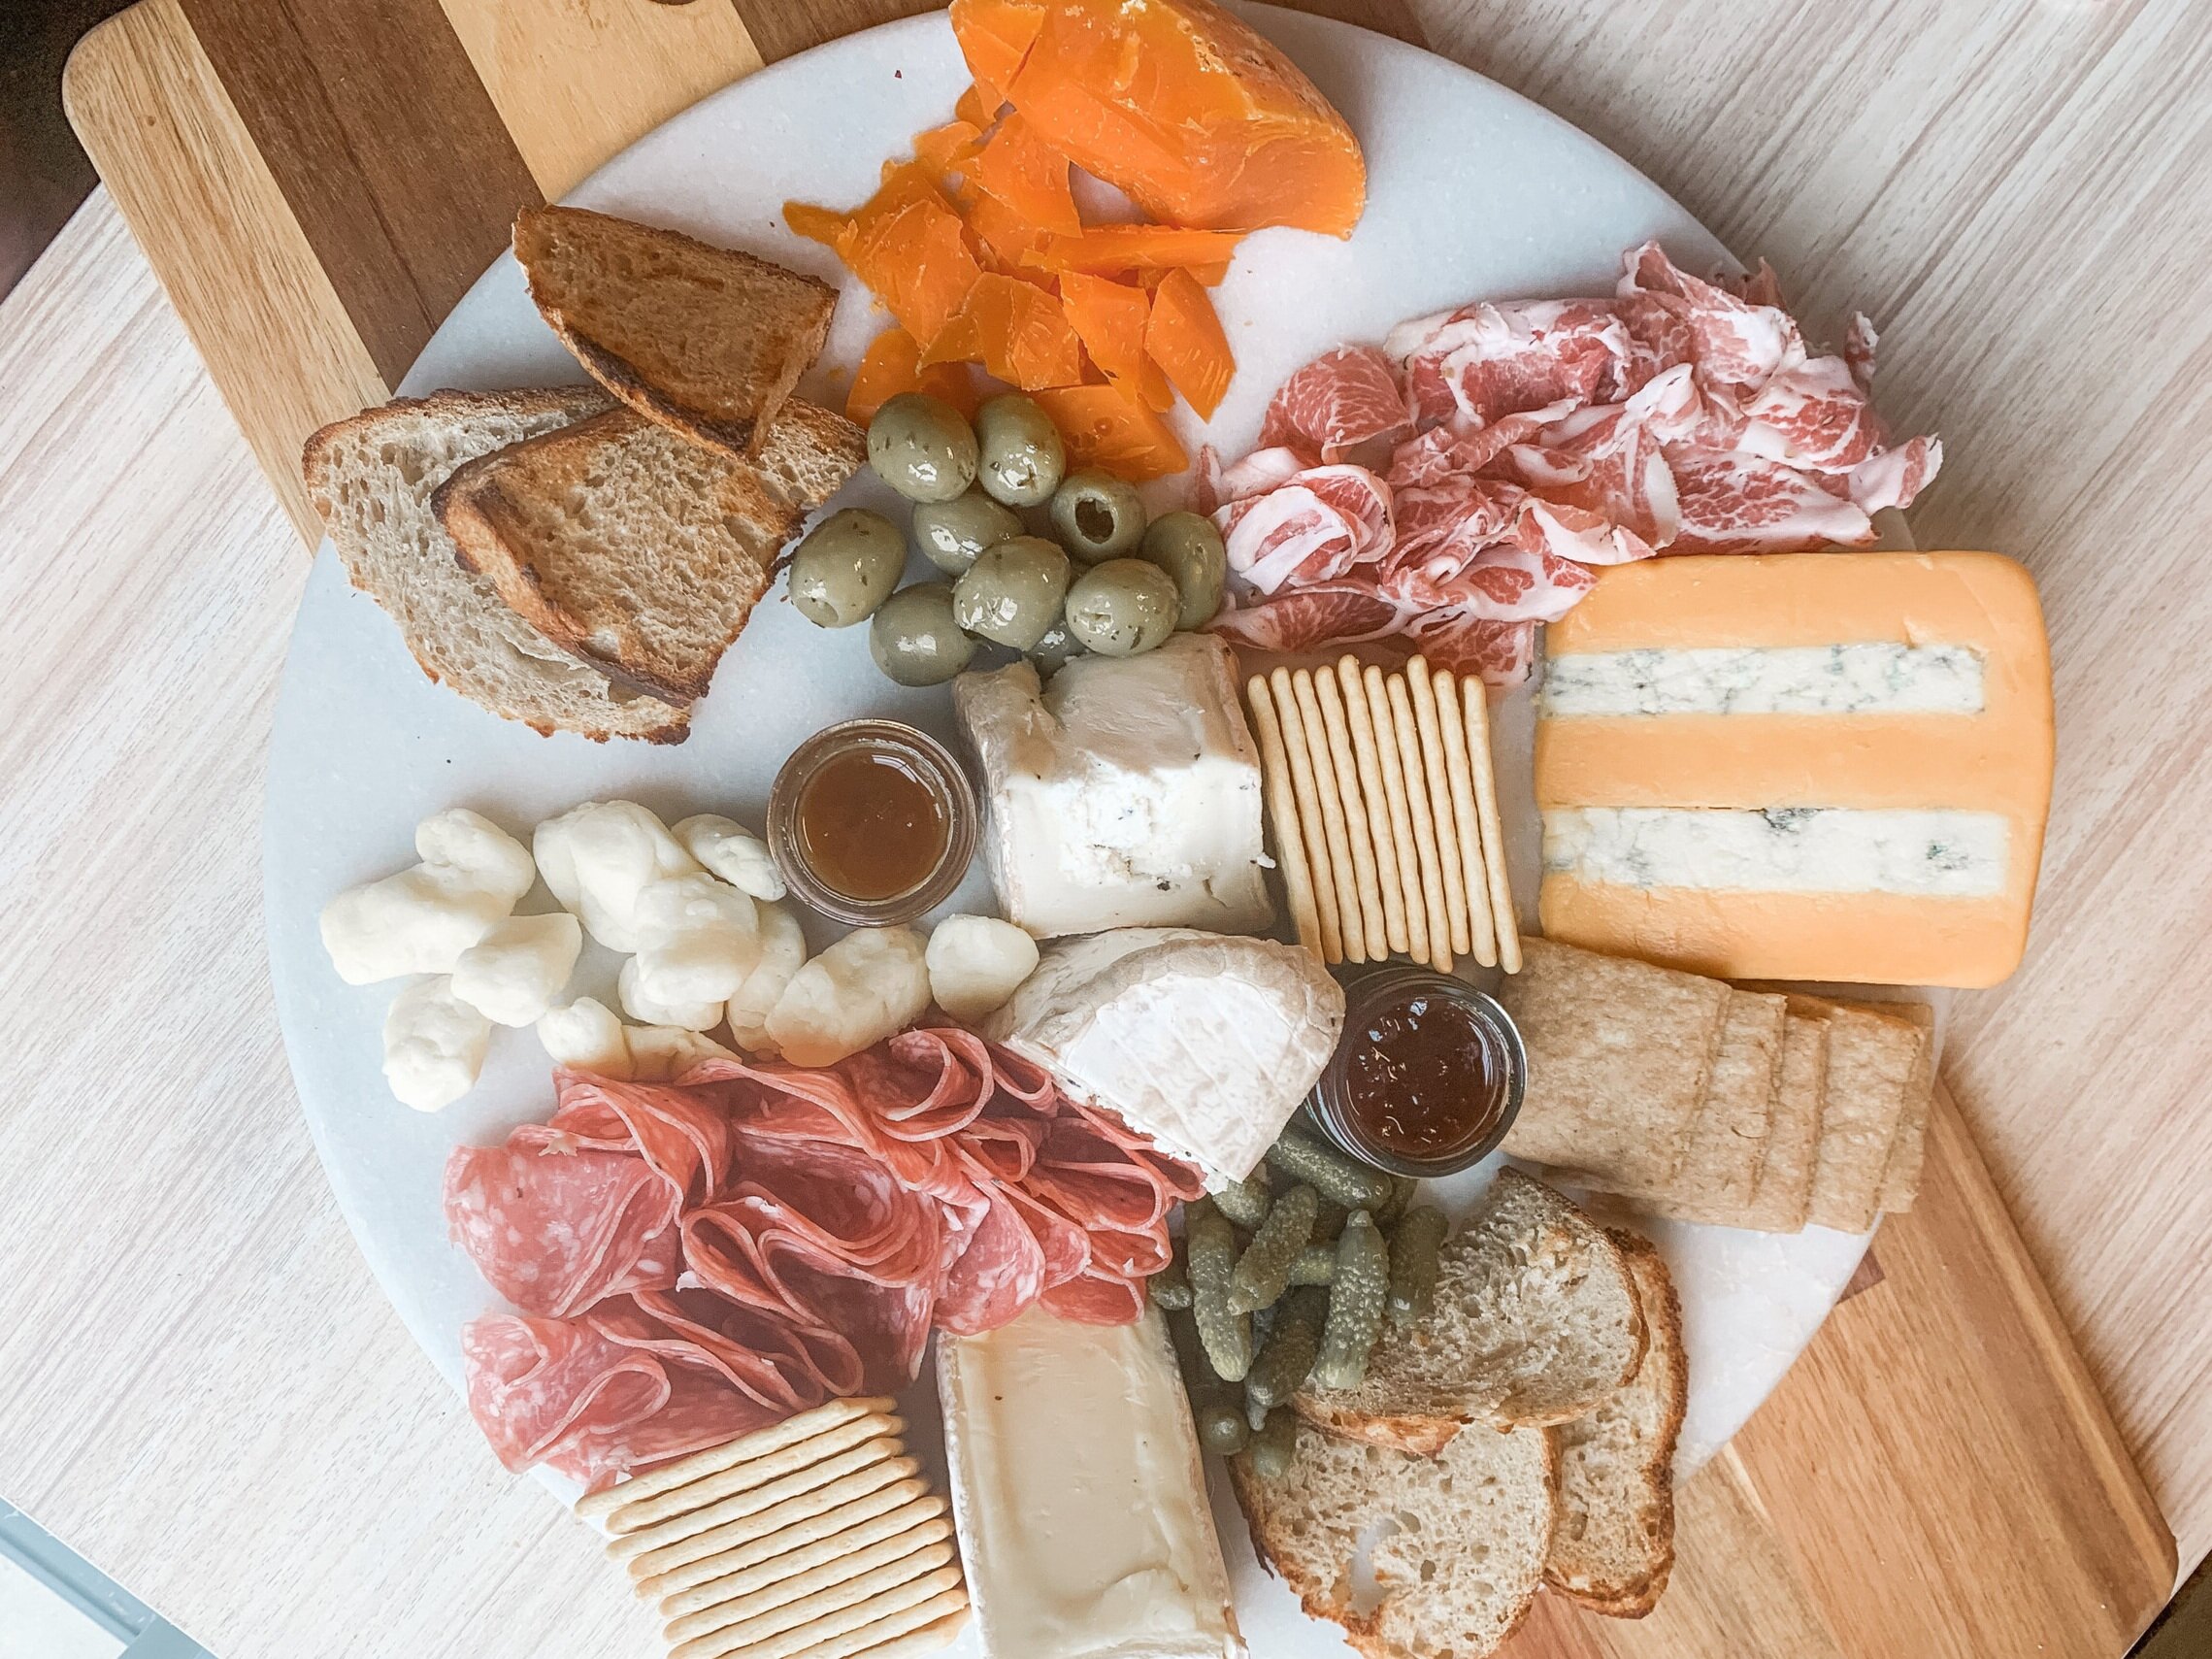
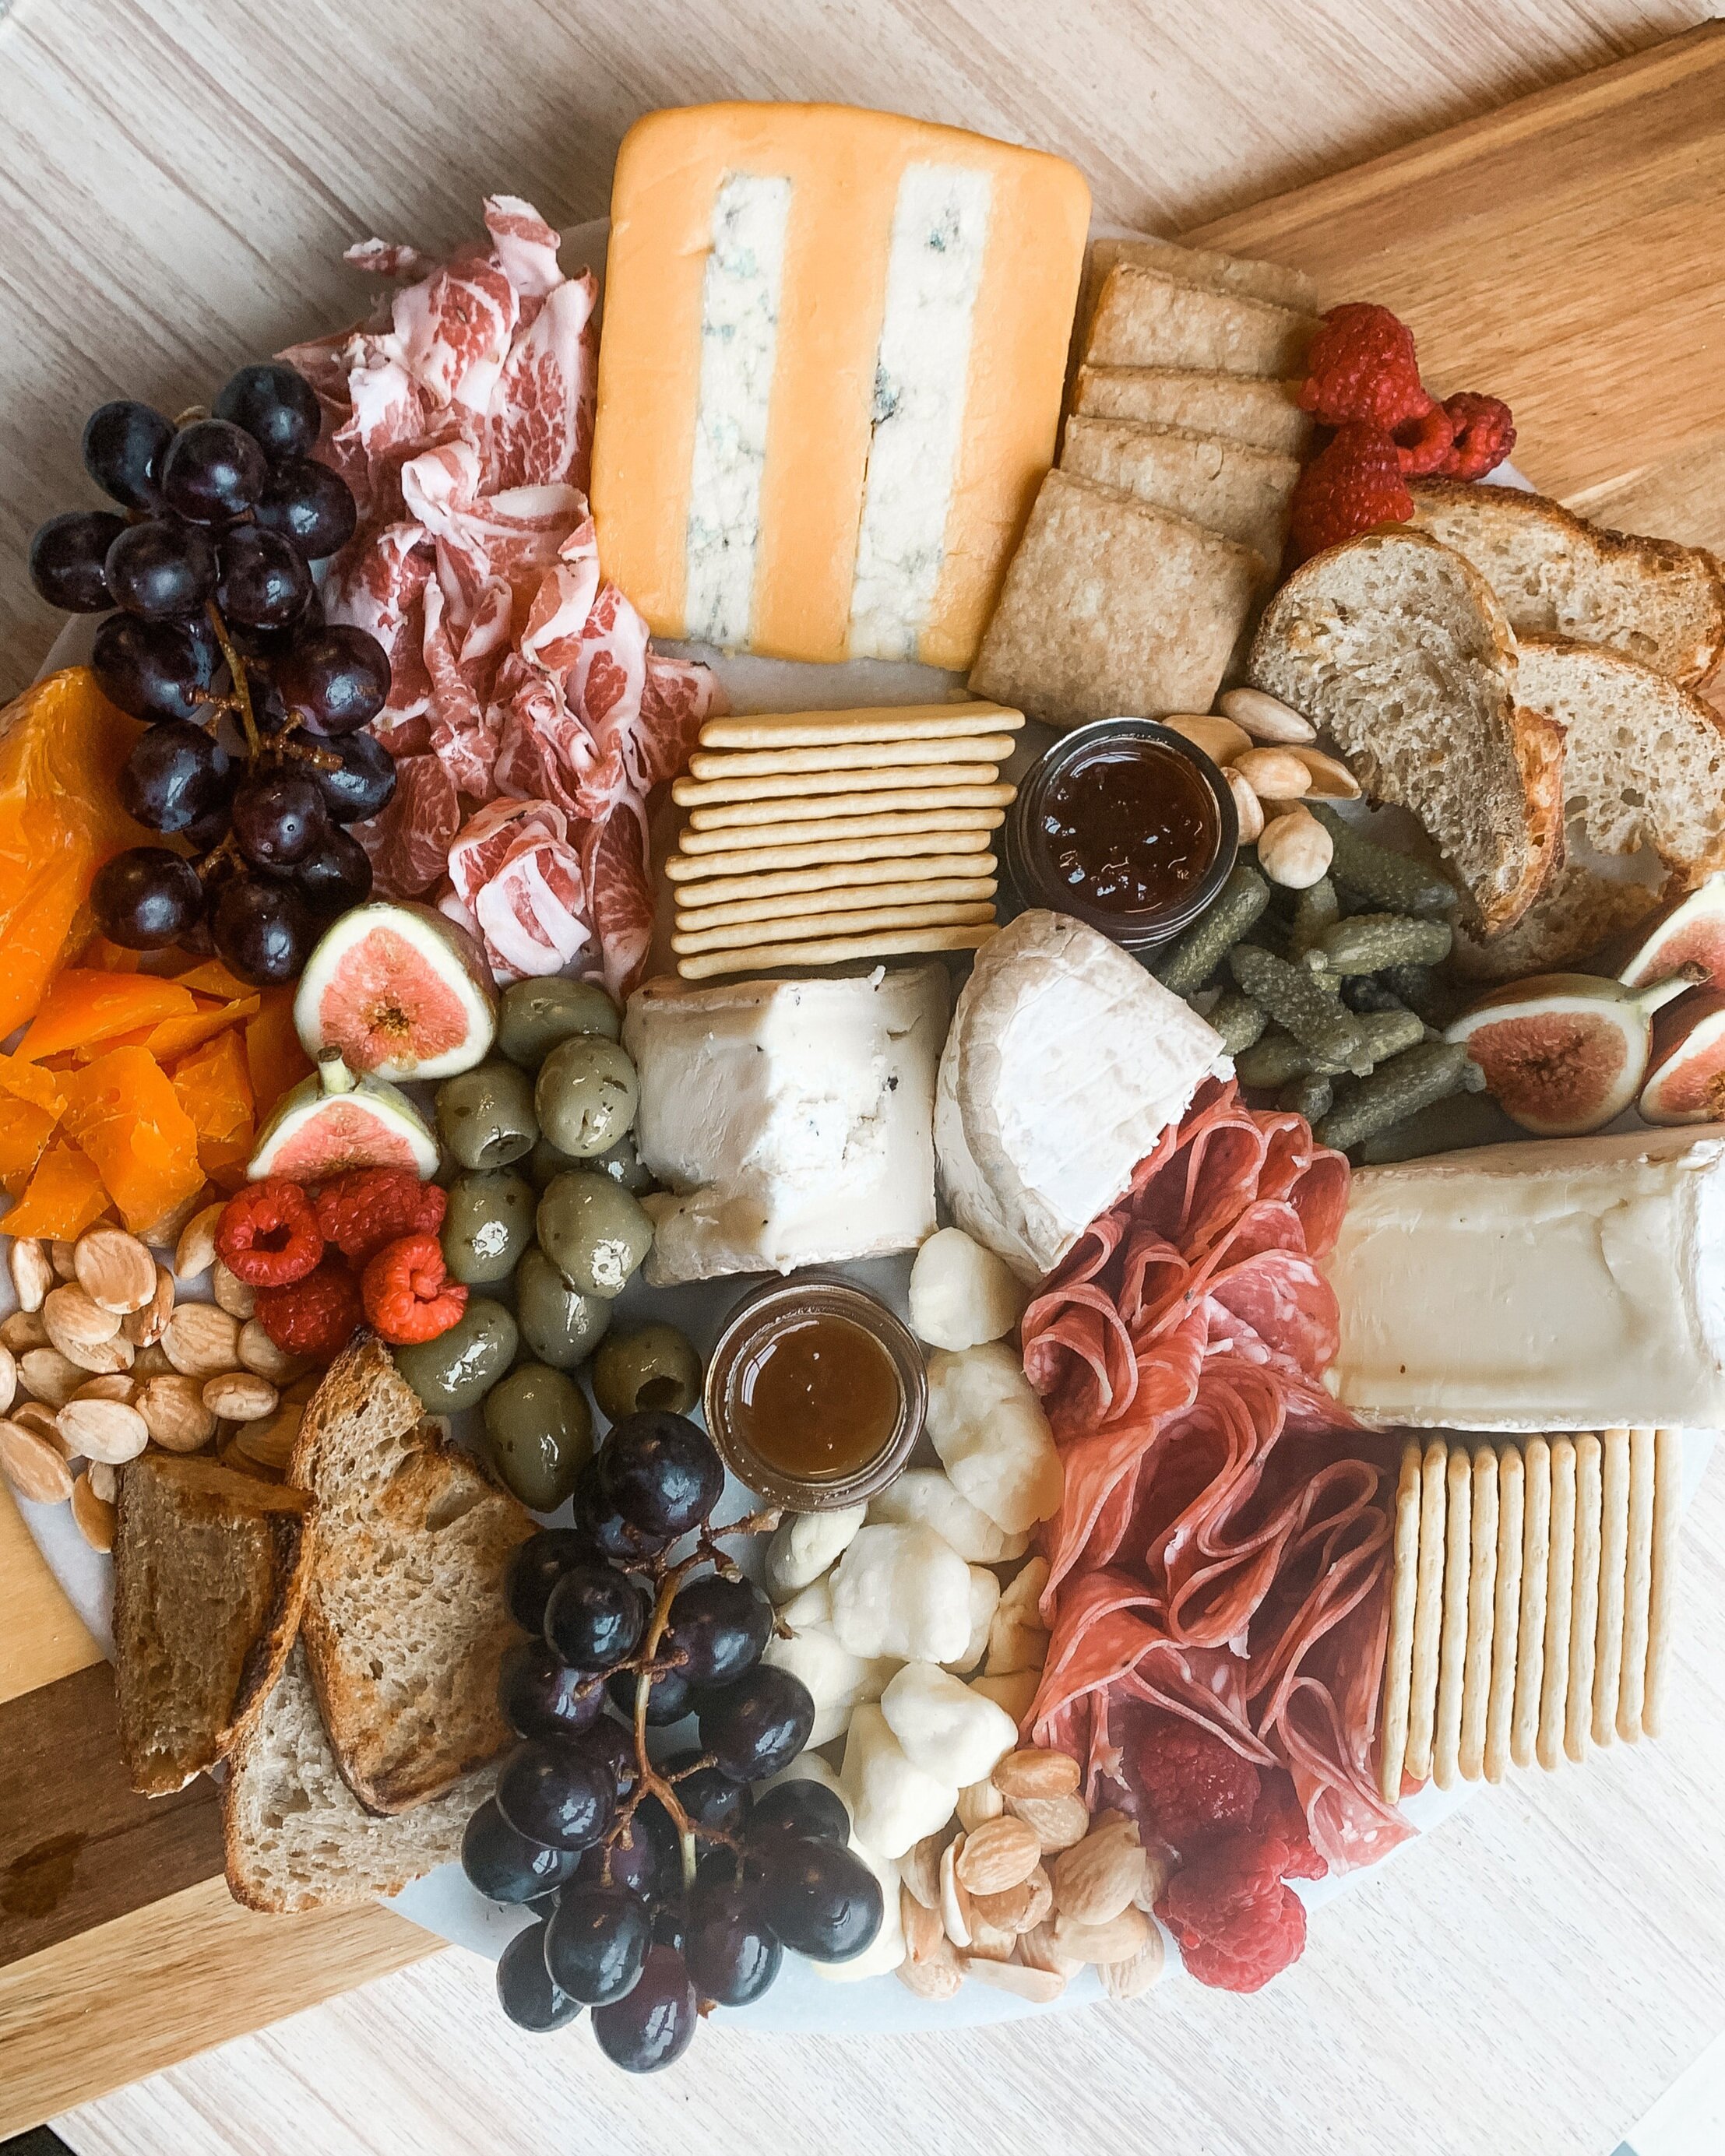
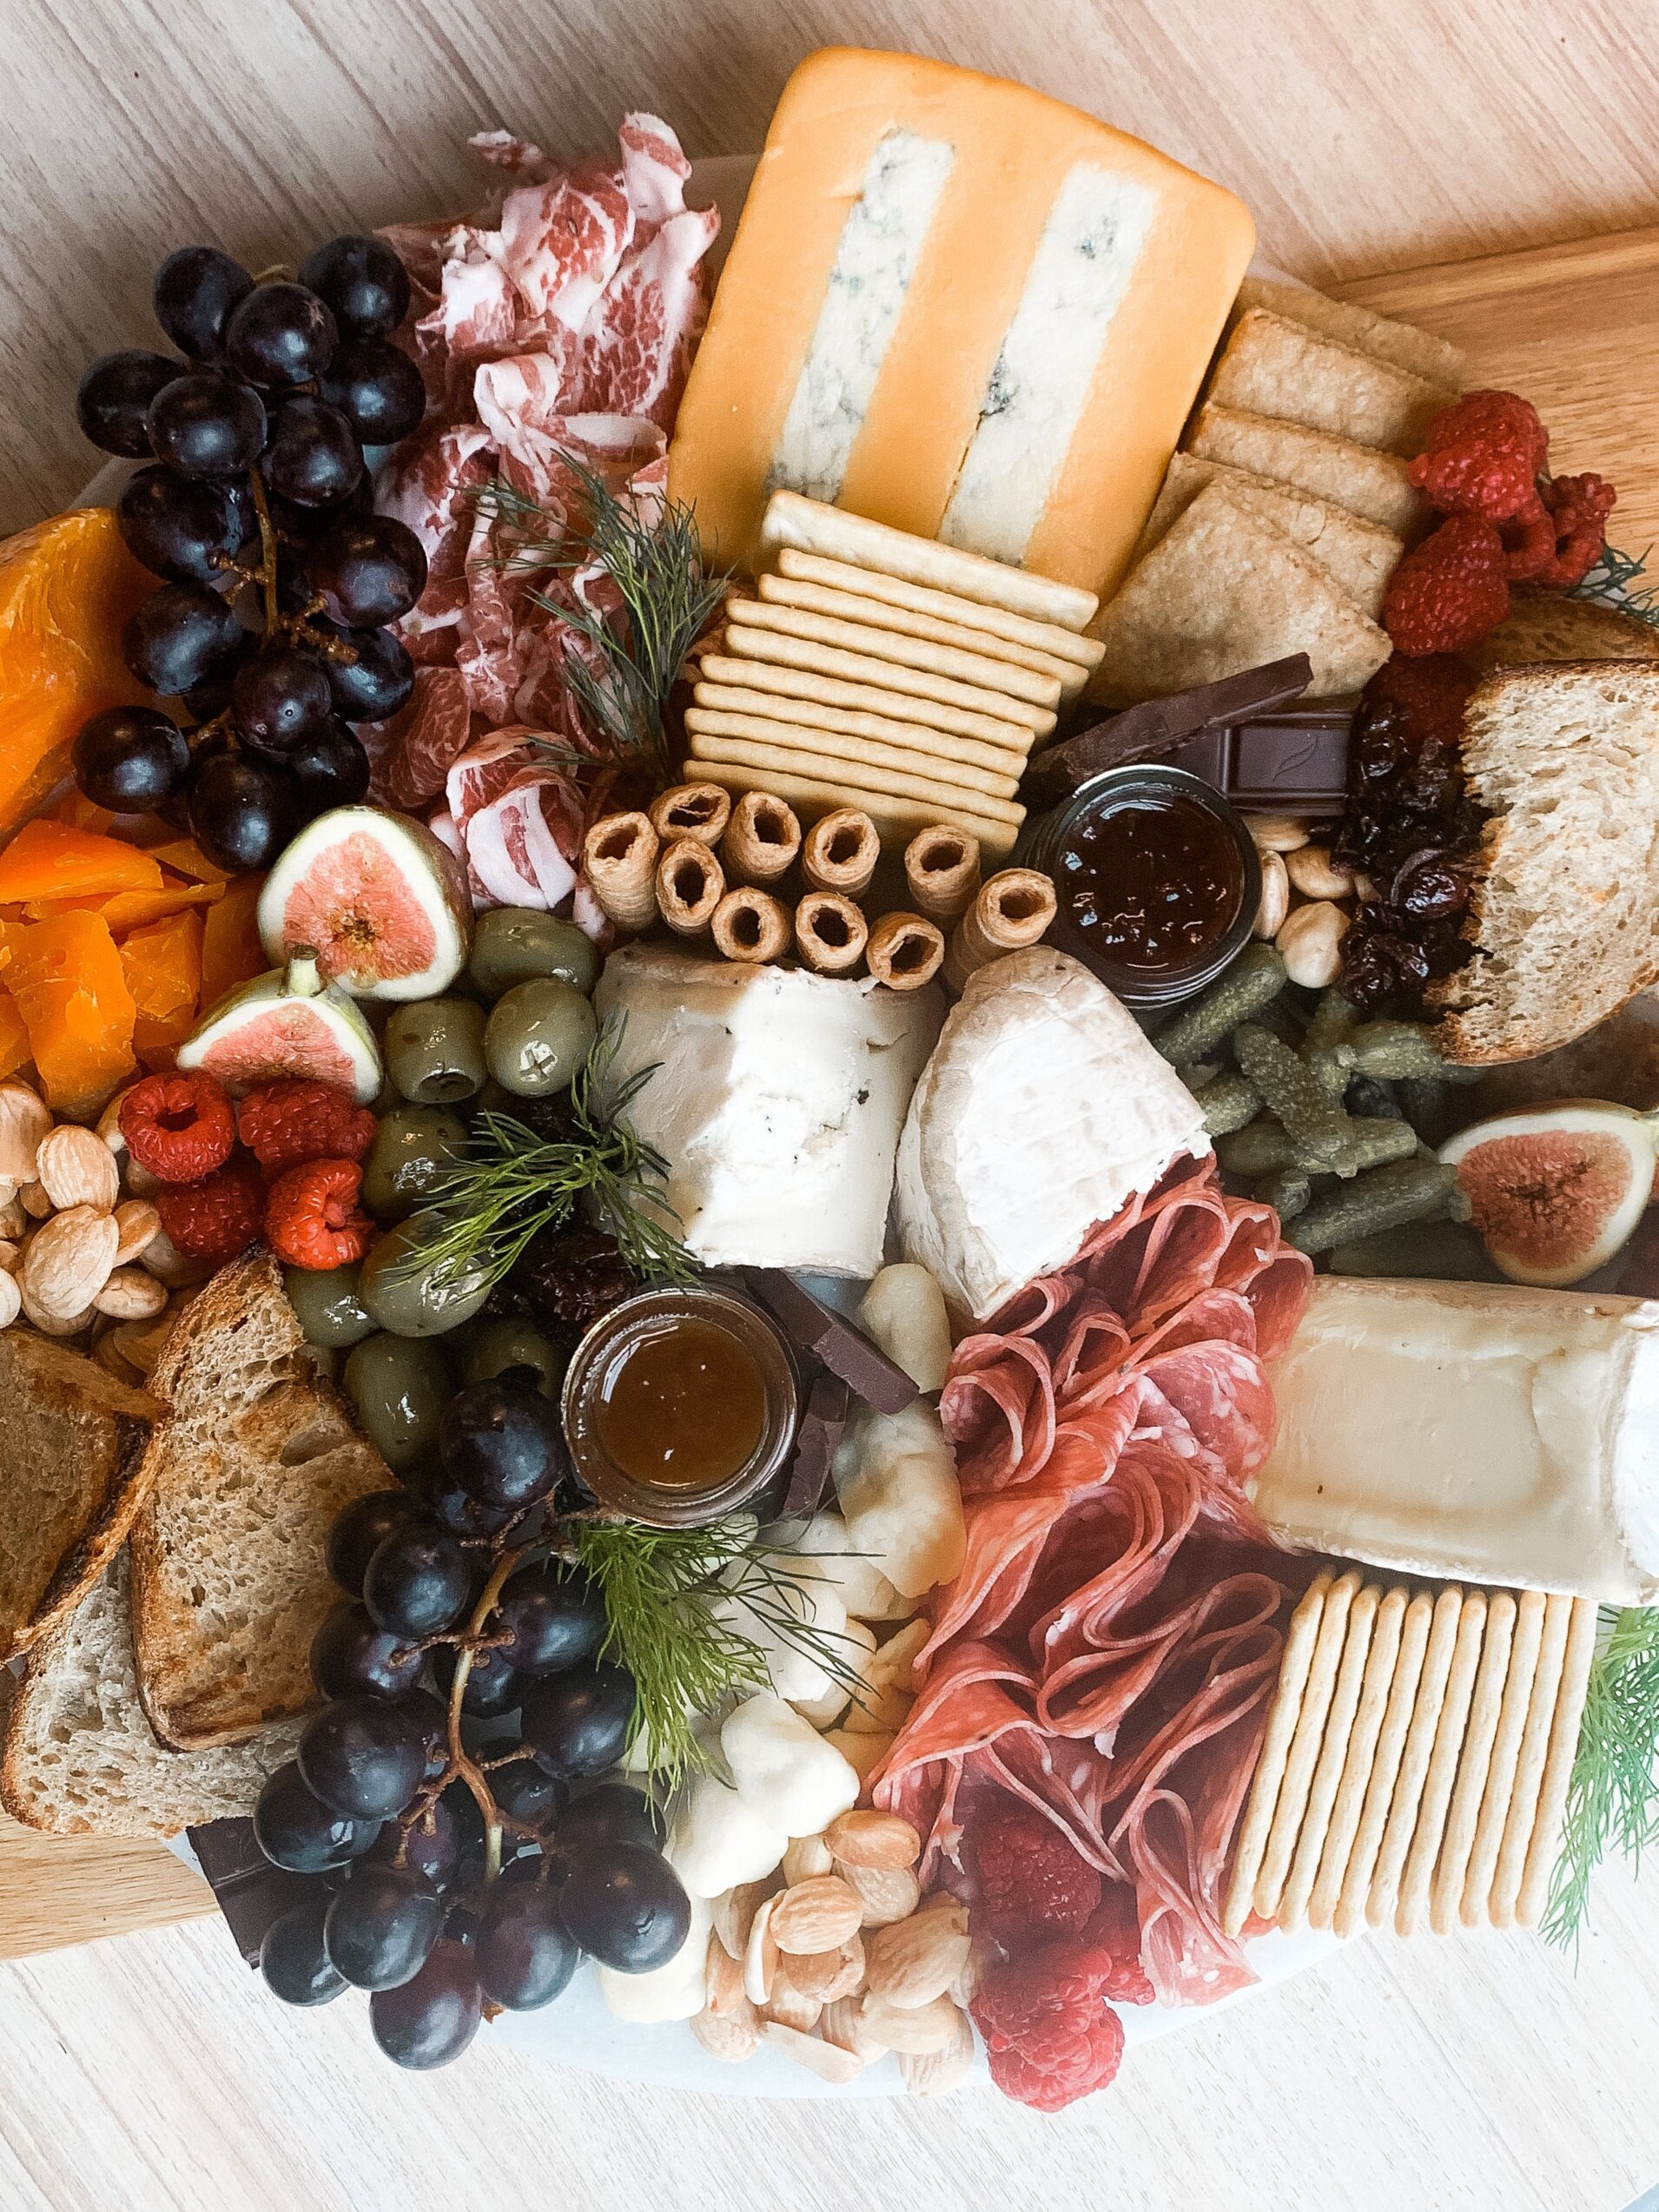
This is typically how I go about it and some rules I try to follow (but there really aren’t any rules, practice makes perfect & each one will be different - that’s what’s so fun about them!) This board in particular was fairly large because it fed around 10 people, but I always think 3 cheeses should be the minimum for any size board - that way you can get a good mix of flavors and textures.
Cheese. Start with the heavier, larger, “main event” items, which usually ends up being the cheeses. I typically start from the middle of the board and build outwards, and I like to always have one cheese in the center. This time I put the Truffle Tremor in the middle. You can also play around with cutting the cheeses different ways. I always leave a couple whole and for some I cut in half (like I did with the Truffle Tremor in the center) or crumble/slice a few pieces off of one block (like I did with the bright orange Mimolette). I also want to make sure to have a few different textures and flavors. On this board, the brie and truffle tremor were the softest, the cheddar/stilton and cheese curds were a medium firmness, and the Mimolette was the hardest (similar to parmesan). The overall funkiness of each cheese also depends on your crowd, so since this was for a larger group I made sure to get some milder cheeses (Cheddar Curds, Brie, and Orange Cheddar), as well as some funkier, stronger ones (Mimolette, Stilton, and Truffle Tremor).
Meat, Crackers/Bread, Cookies. I’ve seen people go about this step different ways. Some do meat first, some do crackers/bread first - I personally combine the two and arrange them together. For some meats, I fold in half and then half again (like the Soppressata), for some I roll into logs/cones, and for others I just messily bunch them on the board (like the Capocollo). For the crackers and bread, I like to make sure I have a good mix of sizes and flavors as well - so on this one I toasted sourdough and also had the crunchy butter crackers. Also, I add larger “bread-type” items here, like cookies (biscotti, shortbread, or in this case - the oatcakes). For meats, I try to get a mixture of harder ones (summer sausage, chorizo, hard salami) and softer, fattier ones (prosciutto, ham).
Condiments and Pickled Affair. After the meat and crackers are done, I add little jars/bowls full of condiments (honey, jam, mustard) and any pickled items (olives, pickles, beets, okra, green beans, asparagus, pearl onions, etc). You can always put the wetter ingredients like these in dishes on the board, but I like to shake any excess liquid off of them and place them in open spots directly on the board.
Produce. Next up I add any fruit and vegetables. I personally prefer boards aesthetically with just fresh fruit and any vegetables that are pickled, but feel free to add fresh vegetables like cucumber and carrot sticks, cherry tomatoes, and bell peppers. I just think it looks prettier without fresh veggies for some reason. I like to have at least two different types of fruit - usually grapes or berries and a stone fruit like peaches, plums, apricots. Place these in the last large open spaces on the board. Because I work from the center out, the fruit and veg are usually more towards the outside of my board, but you can place them wherever there is a large enough space. Just make sure to not put too many colorful things next to each other (produce, pickled ingredients, herbs) or too many not so colorful things next to each other (nuts, crackers, cheese). You want to create balance both with color, taste, and size/height on the board!
Nuts and Such. Finally, I fill in with the small remaining things. In this case it was the dark chocolate bar that I broke into bite-sized pieces, the coco rolls, the dried cranberries, and the almonds. Fill nuts, chocolate, etc in every nook and cranny, making sure to cover any blank spots. You can also fill in with extra berries/fruit or pickled items - or really anything you want!
Herbs, Flowers, and Garnishes. At this point, the board should be completely full! Finish it off with a few garnishes in places that might be dull in color or lackluster. Think herbs, edible flowers, peppercorns, lemon/lime rinds, and micro-greens.
CLICK THROUGH THE SLIDESHOW TO BUILD!

And then it’s ready to be devoured! Make sure to snap a picture of it before completely destroying it :)